Why use Kindle FreeTime?
Why is it a good idea to use Kindle FreeTime for you kids? Is it not good enough for them to just use the Kindle without making it complicated?
To answer these questions I will give you 3 good reasons to setup Kindle FreeTime.
- Your kids won’t have access to the store, and can’t purchase books by accident.
- You can pick which books they can read, and not worry about them reading non-age appropriate books.
- You can keep track of their reading progress, set them reading goals, and help them earn badges and rewards when they meet the goals.
What is Kindle FreeTime?
Kindle FreeTime is a feature that comes with amazon Kindles. It is an entirely controlled environment for your kids to read in. You get to pick books from your collection that they are allowed to read. They can’t access your books, or the books in the store. This will eliminate accidental purchases.
Another great bonus is all of the features offered to your kids that are not available outside of FreeTime. These include the reading goals I mentioned earlier, as well as a progress tracker that keeps track of how many pages you’ve read, how many minutes you read and more.
How to Setup Kindle FreeTime
Setting up Kindle FreeTime is easy and quick. It can be done in a few simple steps.
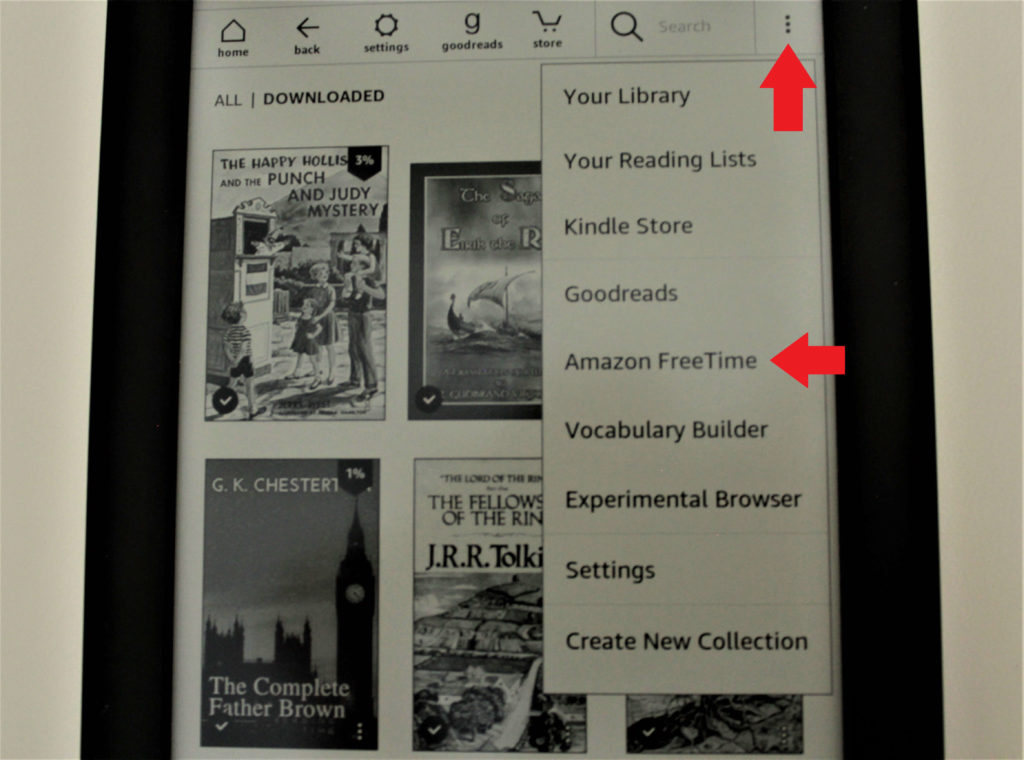
The first thing to do when setting up Kindle FreeTime is powering on your kindle and signing in. Then, on your home screen locate the drop-down menu on the top right corner of the screen.
Step 1
On you home screen, locate the drop-down menu on the top right corner of the screen, as shown in the image below. After pressing this, choose ‘Amazon FreeTime’ Note, on some older Kindle devices (the one shown is a kindle paperwhite 7th gen) it may say ‘Kindle FreeTime’ instead.
Step 2
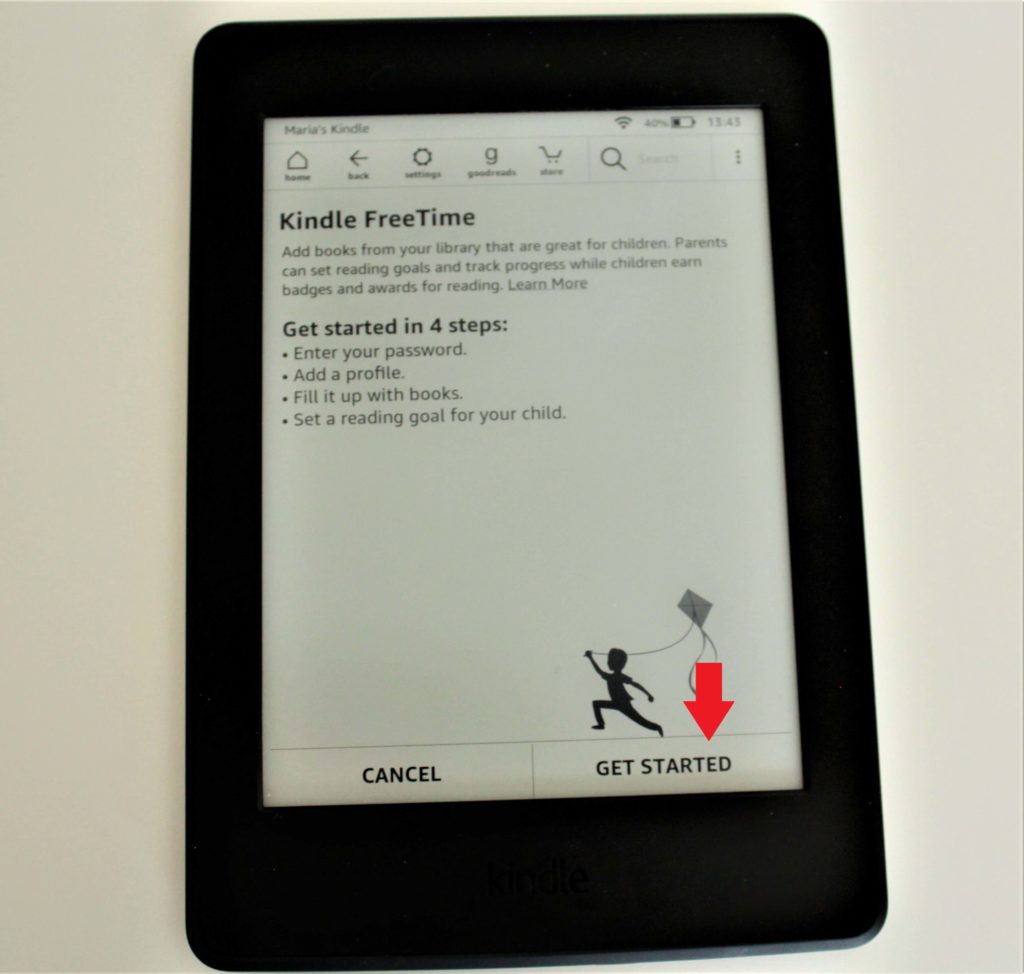
Next, you should see a screen like this. At the top it will say ‘Kindle FreeTime’ and at the bottom of the screen, two buttons. One is ‘cancel’ and the other is ‘get started’. Choose the ‘get started’ button.
Step 3
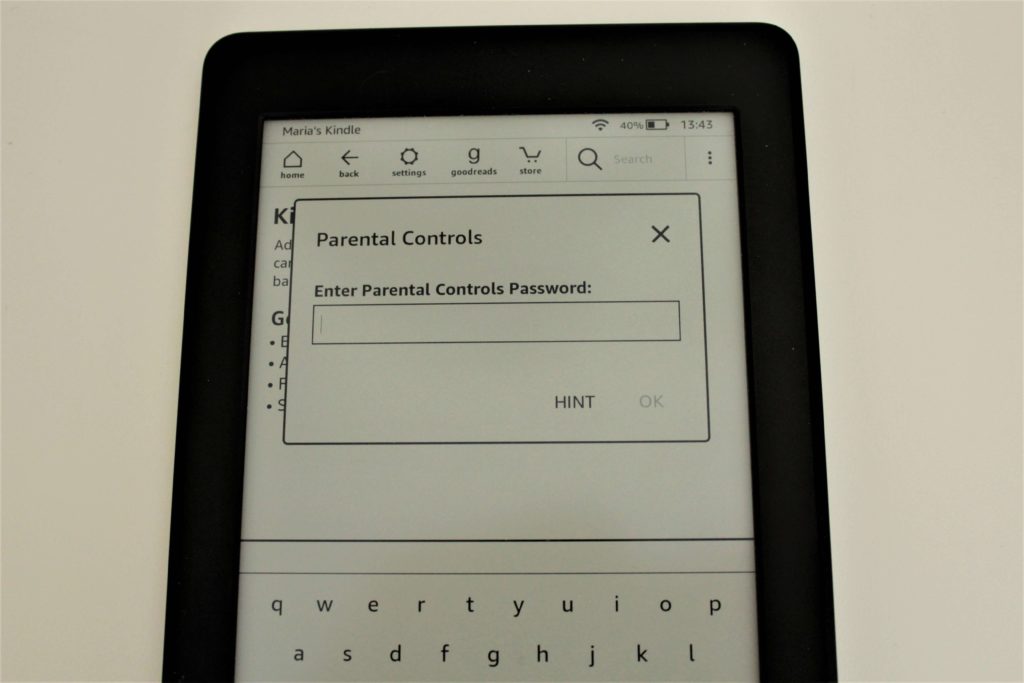
Next it will ask you to enter your Parental Controls Password. If you don’t already have one, it will prompt you to create one. Make sure you set the password to something you will remember, as it is important, and will be used frequently.
Step 4
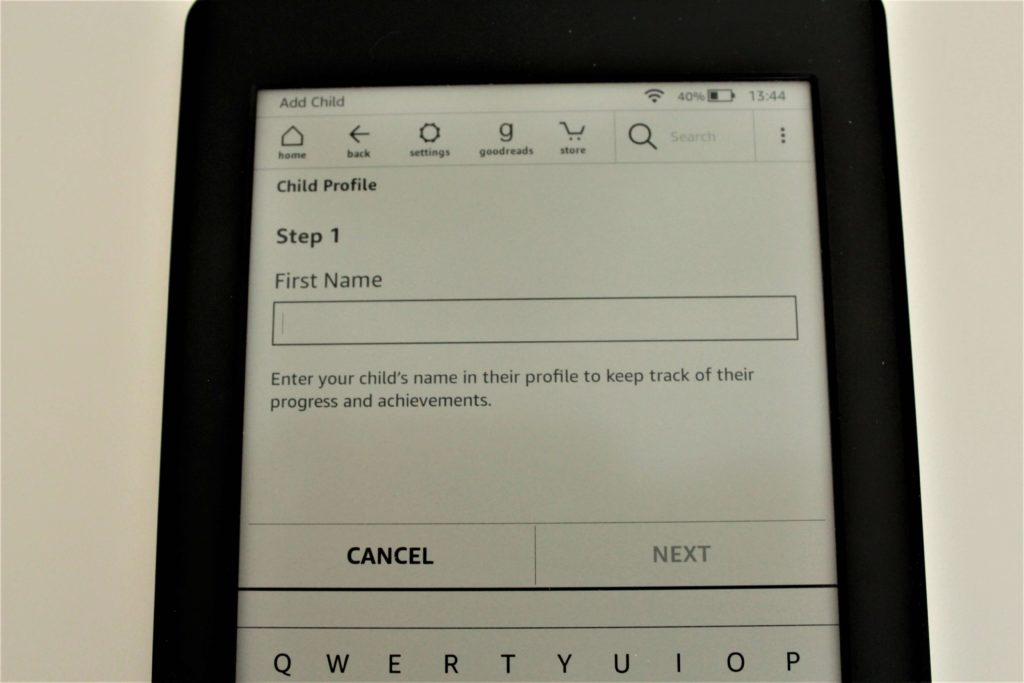
This next part is pretty simple, and straight forward. All you have to do is fill in the first name of the child you are creating the Kindle FreeTime for, and push NEXT. For this example, I just used ‘Child’.
Step 5
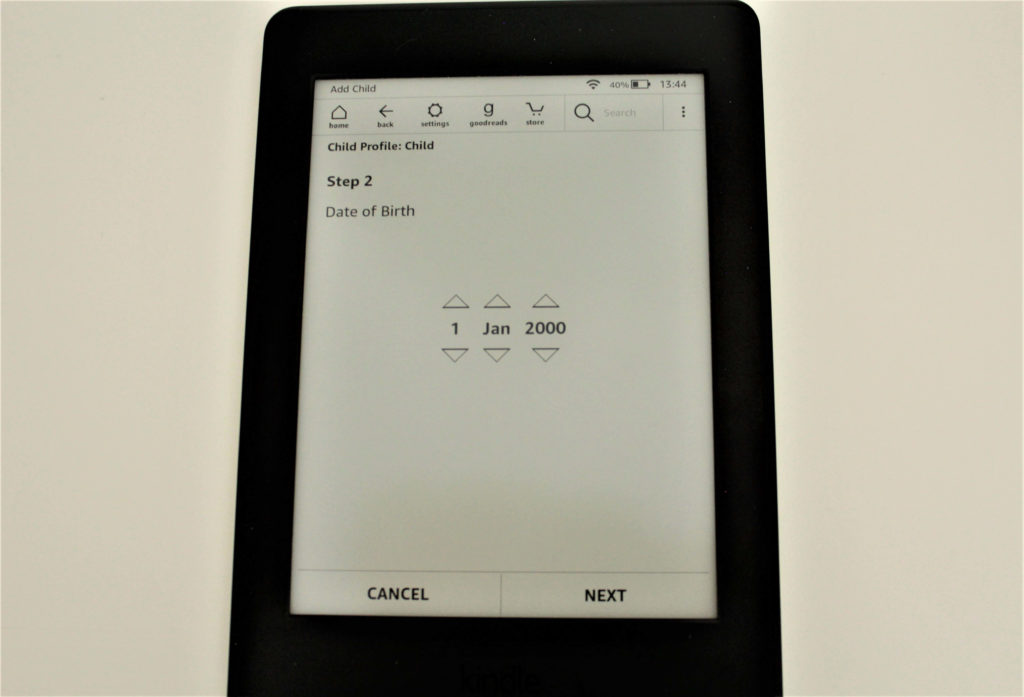
Next, select your child’s date of birth, and push NEXT.
Step 6
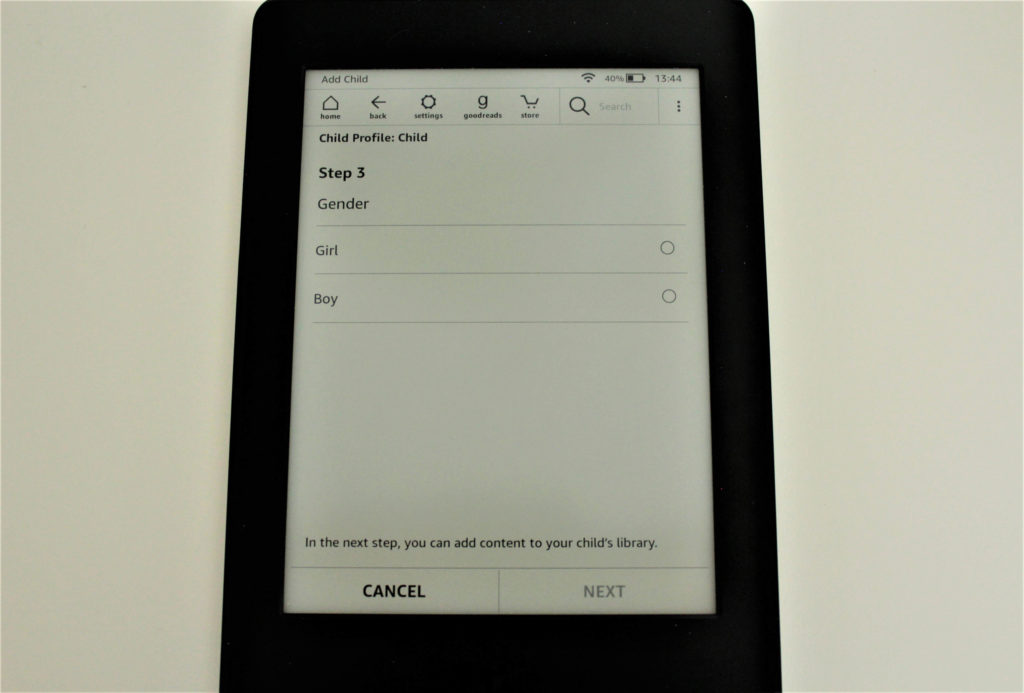
After inputting your child’s age, select your child’s gender, and push NEXT.
Step 7
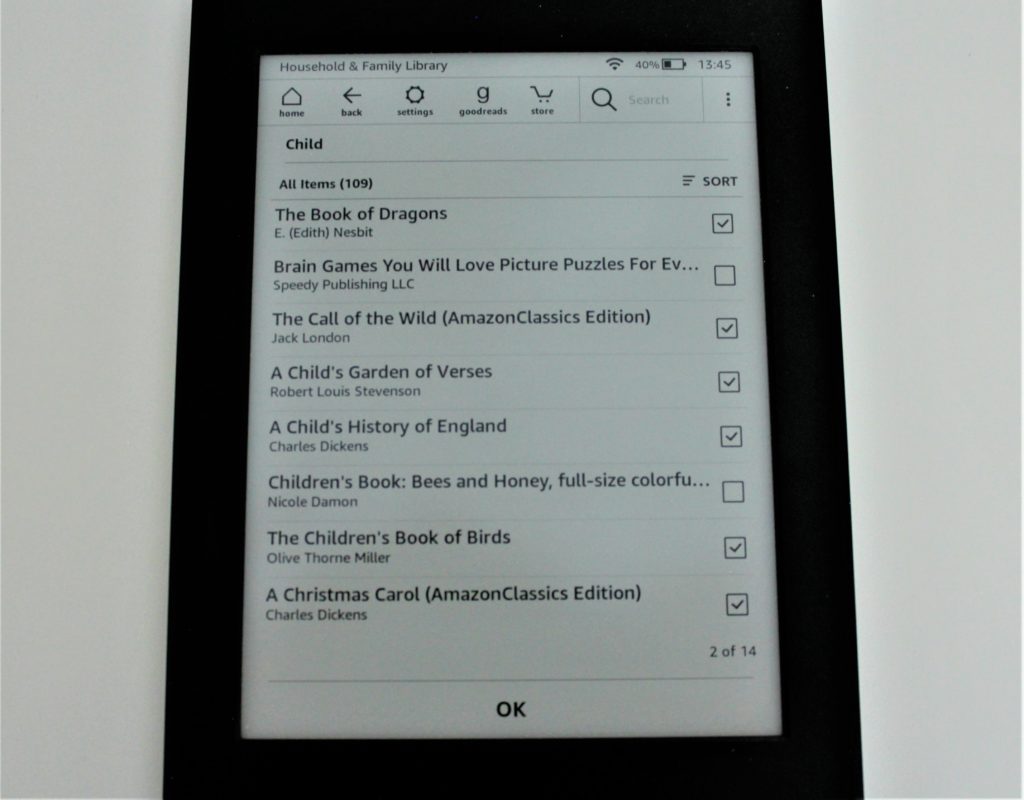
Now it gets to the exciting part! You can choose from your Kindle content which books will be available for your child to read. You can pick those books by simply checking off the box right next to the titles. When you are done choosing the books, push OK.
Step 8
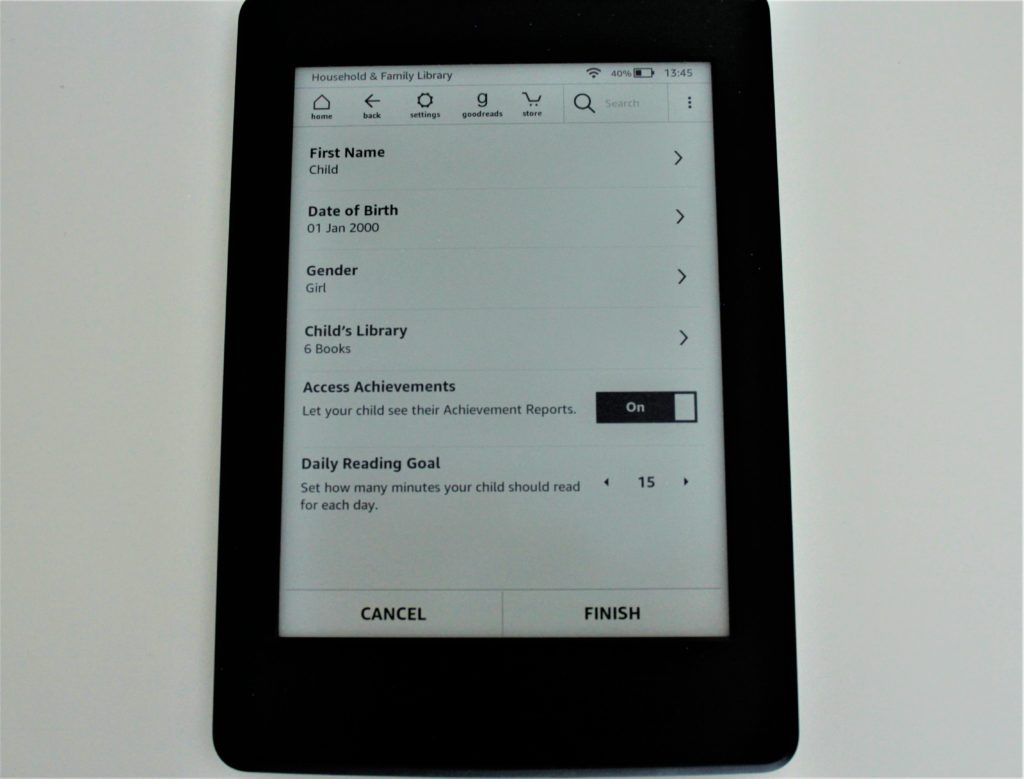
This step is basically a general review of all of the information you put in. You can also select if you want your child to see their achievement reports, and how long you want their daily reading goal to be. The lowest it can go is off, then 5, 10, 15, 20, and so on. When you have double-checked all of the information, and chosen a Daily Reading Goal time, hit FINISH.
There you have it!
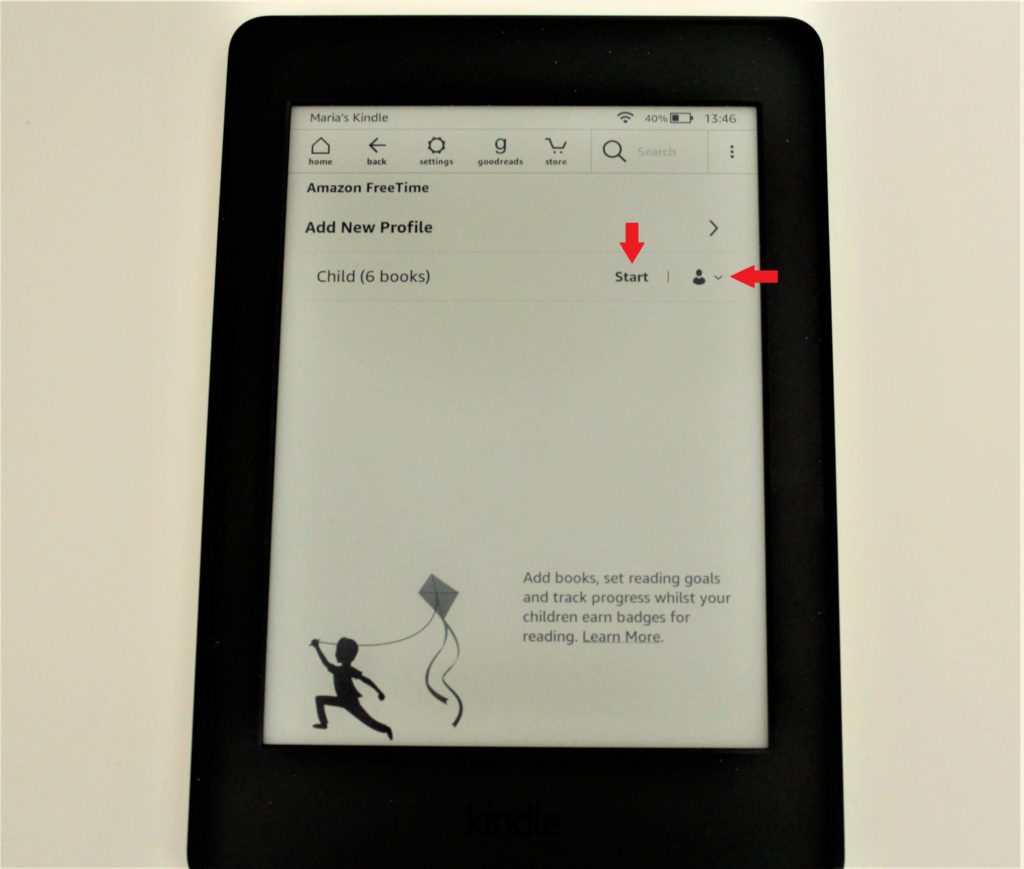
Kindle FreeTime is setup! All you have to do now is push on START next to your child’s name, and hand them the Kindle. To change any of the settings, add or remove books, you can just push on the person with drop-down arrow beside, and view your child’s progress, add or remove from their library, edit their profile, or delete them.
Kindle FreeTime features
Here’s a look at some of Kindle FreeTime features.
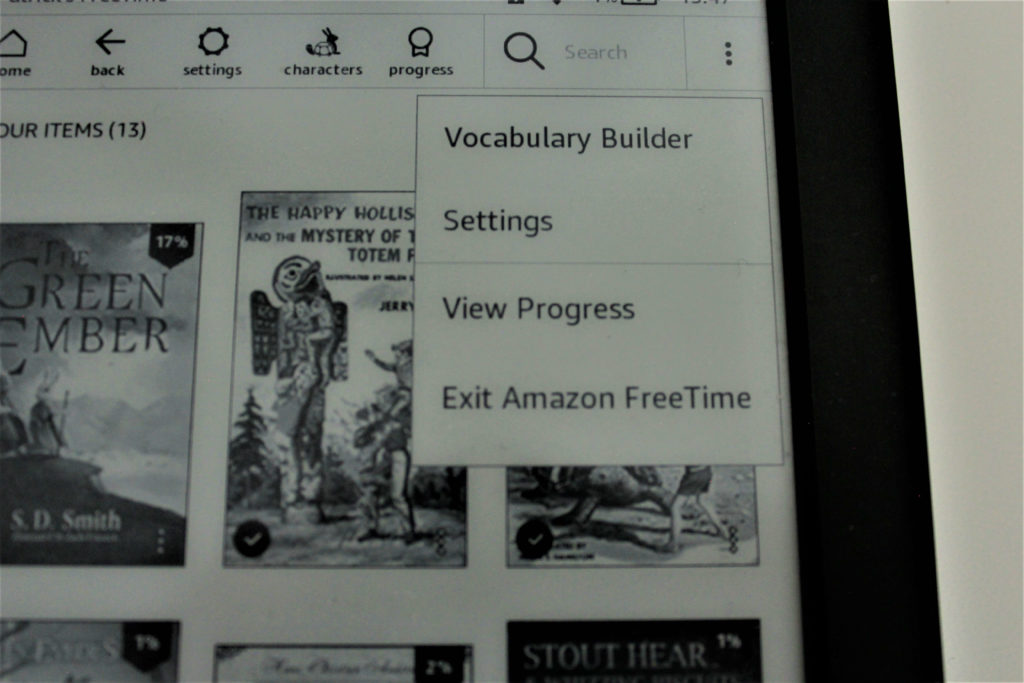
The only options they have available from the drop-down menu are the Vocabulary Builder, Settings, View Progress and Exit Kindle FreeTime.
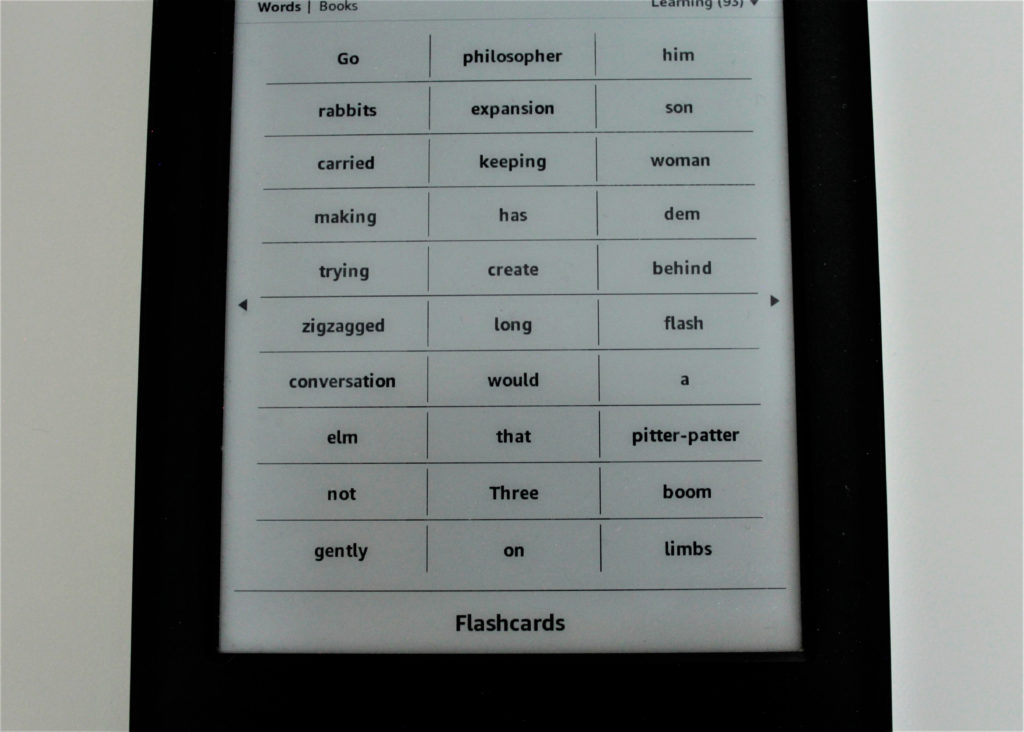
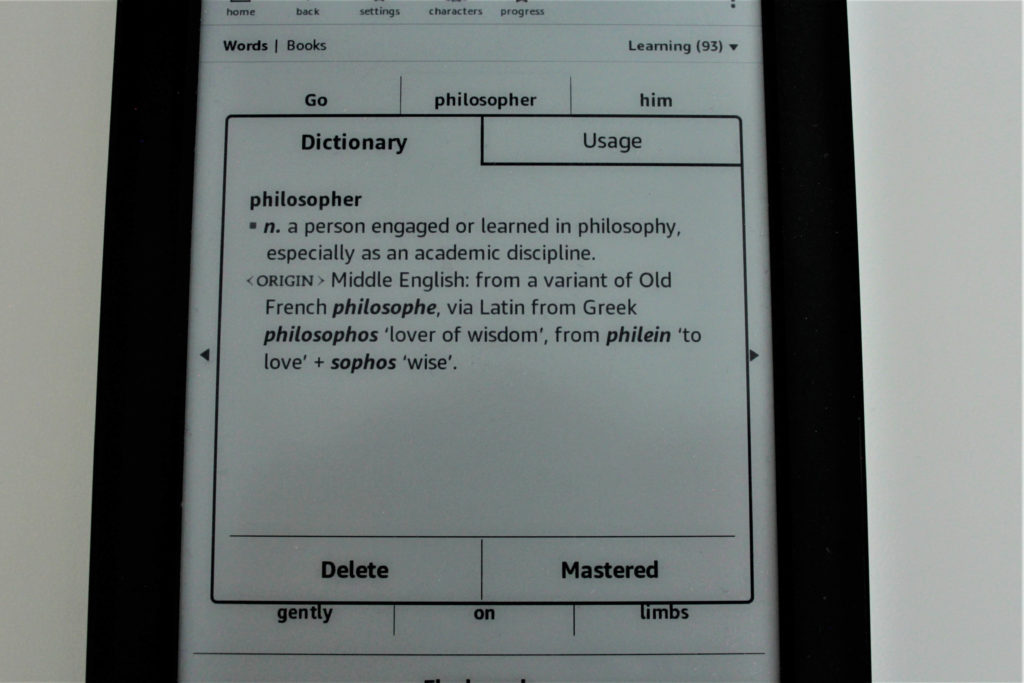
When you select ‘vocabulary builder’, you will see a list of words. These are the words that your child highlighted while reading to see the definition, or translation. Each of the words in the vocabulary builder can be pushed on, and it will display a flashcard with the definition on it. At the bottom of the flashcard you can either select ‘Delete’ or ‘Mastered’.
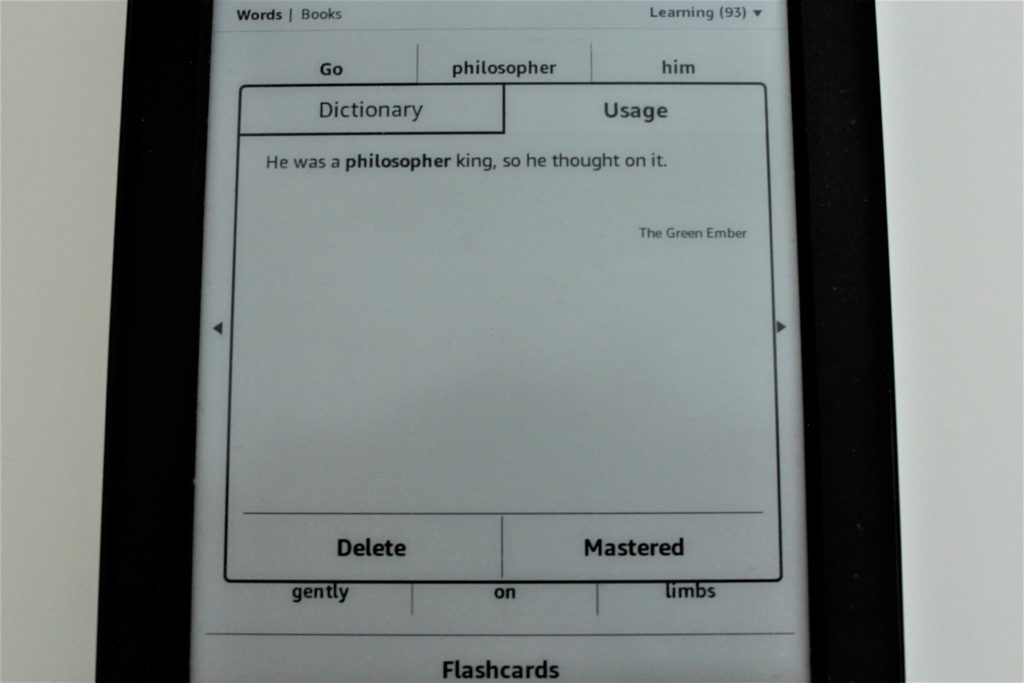
When you push on the Usage tab at the top of the flashcard, it will show you the word used in a sentence, usually the sentence from the book it was clicked on.
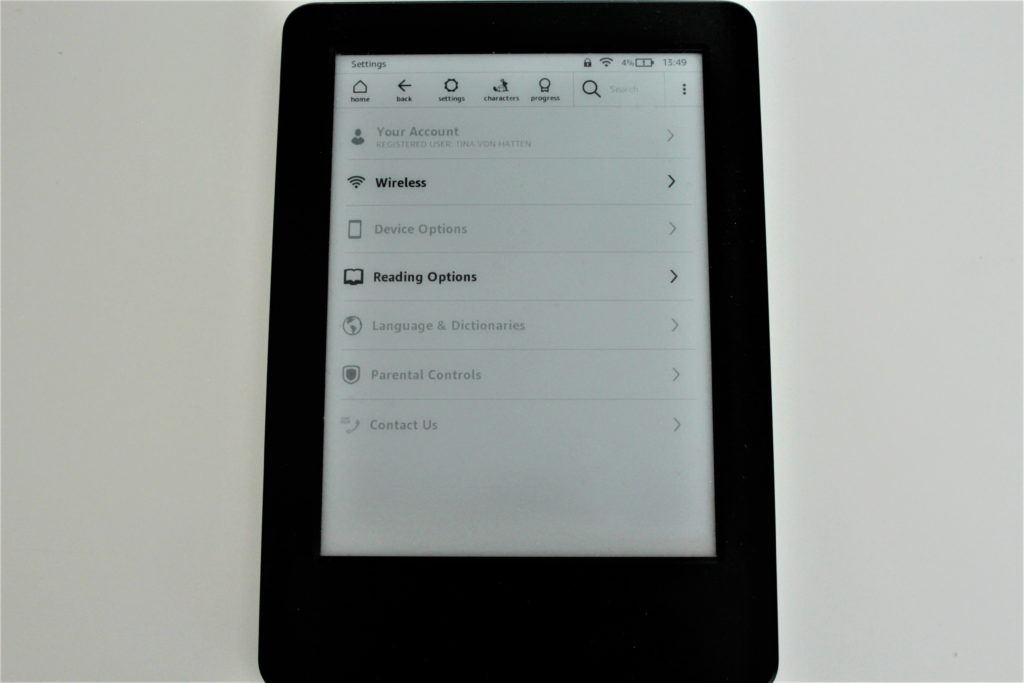
If you child happens to push on ‘Settings’ there isn’t really much they can access. Unfortunately they can access the Wireless settings, which basically means they can put the device into airplane mode, add or remove Wi-Fi Networka, and Delete Wi-Fi passwords. However, if the device is in airplane mode, they can’t tamper with the Wi-Fi settings.
The other setting they can access is the ‘Reading Options’ setting. This one is practically harmless. All they can do is enable Word Wise, which just gives definitions for hard words in the text, or they can change the language they are reading in.
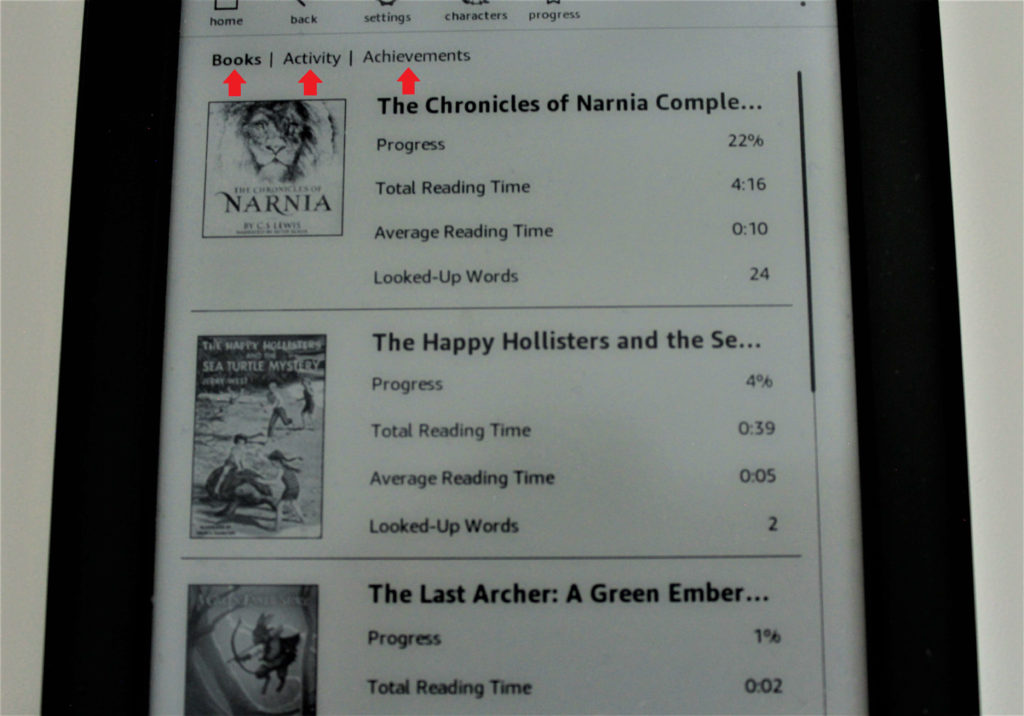
The last thing they could access from the drop-down menu in the top right corner, other than exiting FreeTime is ‘Progress’.
Pushing this will display their reading progress page. On the progress page are three tabs as shown in the picture below. The tabs are ‘Books’, ‘Activity’ and ‘Achievements’. The page displayed is the ‘Books’ Page.
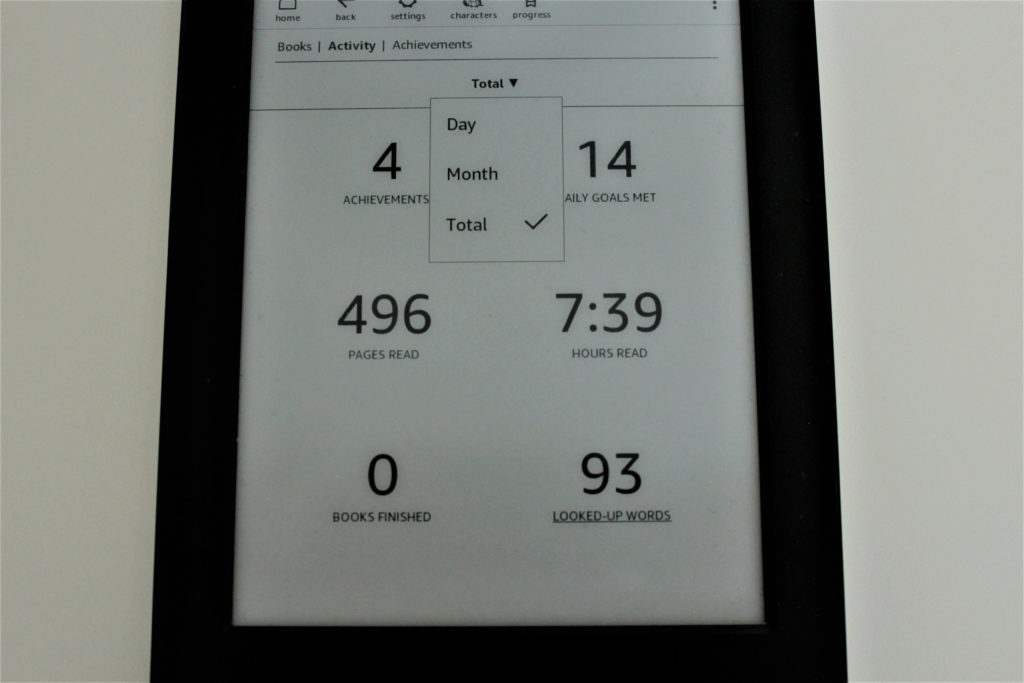
Here is an example of the ‘Activity’ page. You can view the reading activity for the day, month or all time.
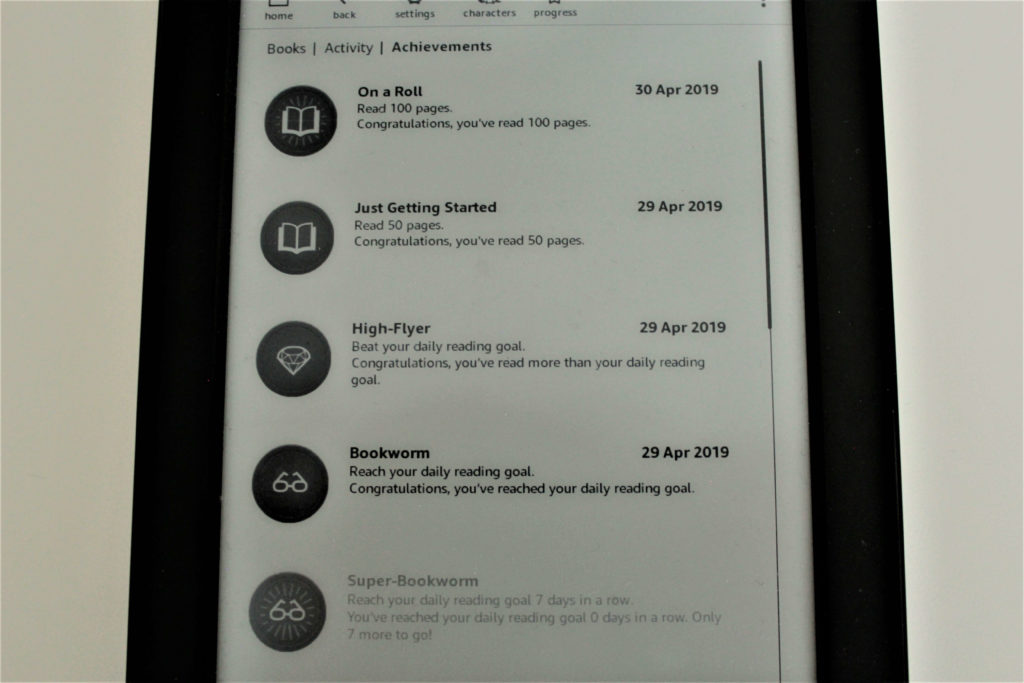
This is an example of the ‘Achievements’ tab.
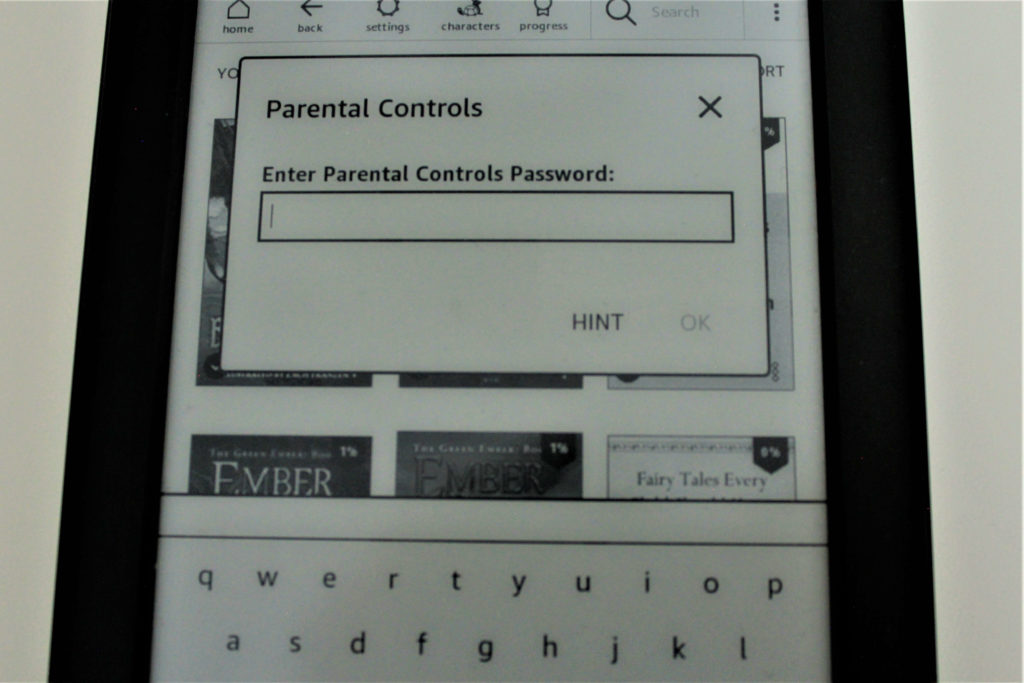
Lastly, if they hit the ‘Exit Amazon FreeTime’ or ‘Exit Kindle FreeTime’ button a pop-up will come on the screen asking for the Parental Controls Password. This is why it is important to choose a password you will remember.
You also need the password when adding or removing books from the FreeTime library and editing the profiles.
That’s all folks!
I hope you found this post helpful. I tried to include as many images as possible and make the instructions clear. The setup is really easy, and doesn’t take very long from start to finish.
If you have any questions, or comments please leave them in the comment section below.
Happy Reading & Writing!

