No matter what type of content you’ll be recording, you might need to utilize a teleprompter. The setup and adjustments you’ll apply will mostly rely on the device you choose to purchase, nevertheless, there are some main setup tips and tricks that’ll allow you to produce amazing videos without any hindrances along the way.
If you were wondering how to set up a teleprompter for a DSLR camera properly, you’re lucky, mostly because this is exactly what we’ll be discussing in our 2024 guide today. So, without further ado, here is our list of the top setup tips and tricks that you should remember and, of course, use:
1. Before Anything Else – You Must Center The Lens of The Camera
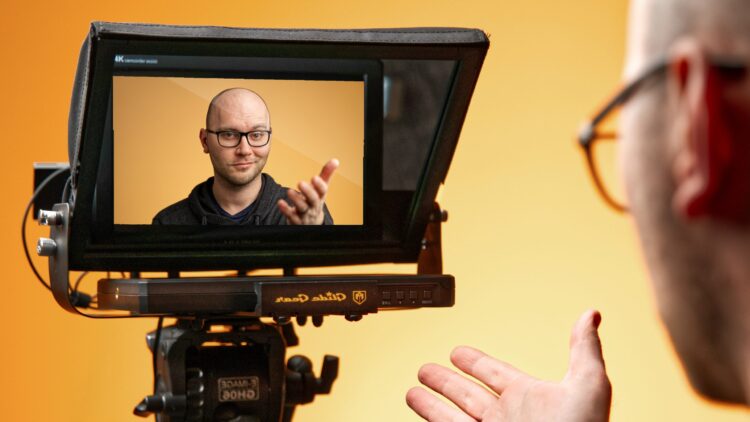
Before you take a look at any other tips from our guide, the first thing that you must do is to center the lens of the cameras on the back of the teleprompter hood or glass – this will rely on the type of device you opt for – and more importantly, you must ensure that the hood or glass isn’t coming into contact with the lens. Relying on the kind, you could alter the height by pulling it up or down or you can use the mounting scale to alter the height of your DSLR device.
Additionally, you should ensure that the camera is tightly fitted onto the teleprompter since this will guarantee that it isn’t moving all the time when you’re walking with the tripod it’s adjusted on. Hence, you should play around with it a little bit, so that you can see whether or not it’s adjusted properly. To ensure this, simply record a video to see how it’s adjusted and once you’re done, you can move on to centering the monitor – which leads us to the next point in this guide…
2. You Must Center The Monitor as Well
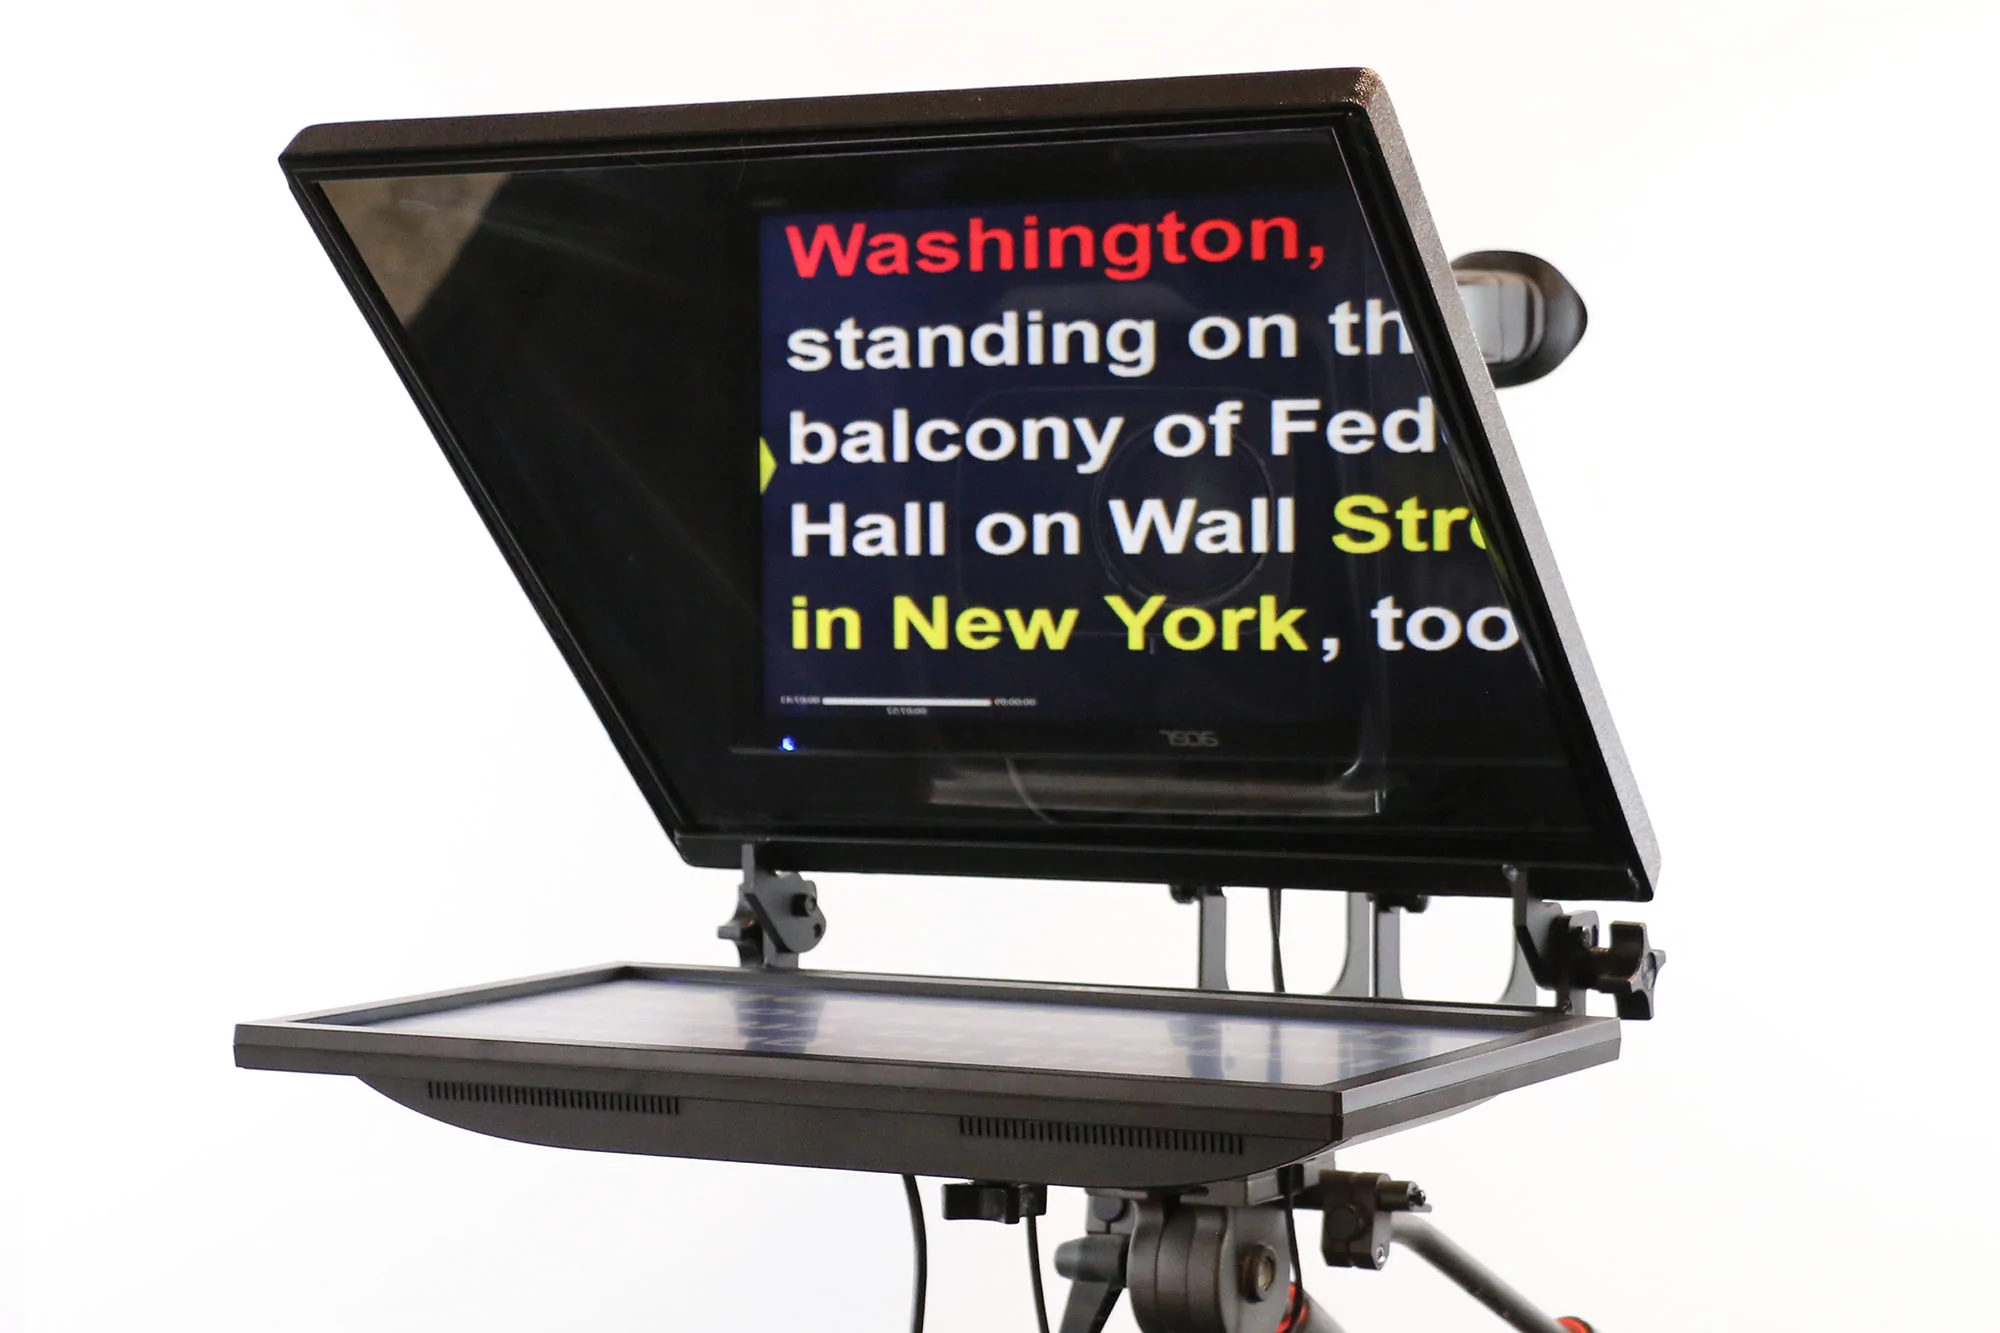
Once you’re done with the aforementioned step, you should then move on to centering the monitor over the DSLR teleprompter. This is a crucial step in the process, mostly because it’ll create a straight reflection, meaning that the presenter won’t have any issues with reading what appears on the device. Because of this, you should work with the presenter to see what position suits them best so that they have no issues when the recording begins.
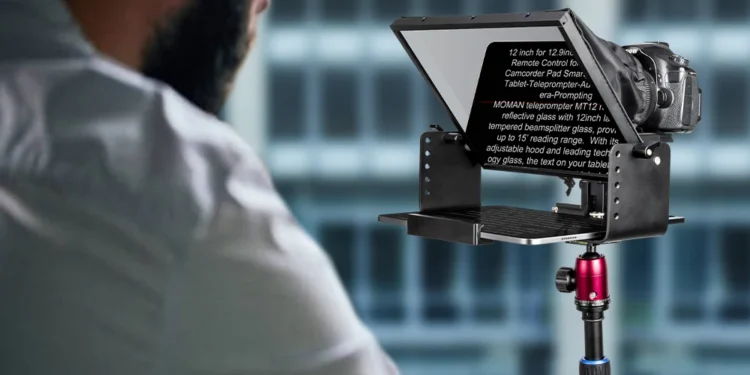
3. Center Both The Devices Above The Fluid Head
This is, perhaps, the most important step in the entire process, in which you’ll need to center the device and camera so that they’re all equally balanced. If you, for instance, opted for a Moman teleprompter for DSLR cameras, you must adjust the weight towards the head from the front of the device, and by doing so, you’ll ensure that the whole setup isn’t moving – something that can cause your videos to appear shaky. The weight of the prompter must be equal to the camera, and of course, they’ll have to balance each other out.
4. Test Out The Settings
When you’ve completed the first three steps, you must, I repeat, you must test out the setup so that you can see whether or not there are some things that you need to adjust. With a DSLR iPad teleprompter, you can connect it to your tablet, and from there, you should be able to see two screens, one for the operator and the other one for the person that’ll be presenting the text. Because there are two displays, you must work with the presenter to see whether or not it suits them.
While testing, ensure that you coordinate everything since this will enable you to gain a better understanding of the presenter’s reading and speaking speed, and you’ll also learn how they tend to gesticulate, all of which could help you create amazing content. Naturally, if there are any hindrances along the way, you should change the settings according to your needs and preferences, and once you do, test it out again until you get something that you like.
5. It Needs Maintenance, Just Like All Other Devices
Even the best Android teleprompter for a DSLR camera will require regular maintenance. Now, we don’t mean that you should take it apart every time you use it and clean it, instead, you should perform some simple maintenance tasks, all of which will help you produce amazing content. For starters, ensure that the glass is clean before every recording, since if not, dust can accumulate, which can easily cause your videos to be blurry.
Now, you must keep in mind that the glass is quite fragile, especially ones on teleprompters, thus, you must be extra careful when maintaining it. To clean it, you should utilize a liquid cleaning agent, similar to the ones you use for cleaning your windows at home. Also, utilize a soft cloth to wipe away any dust or fingerprint and you’ll be good to go. Also, be careful not to extract the protective coating of the surface since if you do, you’ll have to replace it, which can be expensive relying on the device you opted to purchase.
6. Remind The Presenter About Eye Contact
This isn’t really a setup tip, but it’s still worth mentioning it, mostly because it’ll permit you to have a smooth recording session. When the person reading is too focused on reading the words on the display, they can quickly forget about maintaining eye contact with the camera, which is something that allows the individual to connect with their audience. Because of this, they should read through the script so that they already know it, thus, they can simply use the teleprompter as a reminder of what is coming next.
7. Start Recording!
If you go through each of the steps we’ve mentioned, you can start recording your content! Following the steps we’ve mentioned will allow you to have a fun and interesting experience instead of losing your patience and time trying to set up the teleprompter. You should remember, no matter if you use a portable teleprompter for DSLR cameras or one that is static, trying out the settings is a must so that you can have a nice experience while recording.
Conclusion
In order for you to set up a teleprompter properly and quickly, you should follow the steps we’ve mentioned above. Not only will our tips and tricks help you speed up the entire process, but they’ll also allow you to create mesmerizing and fun content that your targeted audience will enjoy watching! Since you now know what you must do, don’t lose time, instead, start setting everything up!